How to Use an ASTM D5264 Sutherland Rub Tester in 2026?
In 2026, printed packaging faces tighter quality expectations, faster production cycles, and greater material variation. Smithers’ “The Future of Global Packaging to 2028” identifies continued packaging growth, while sustainability trends are increasing the use of recycled papers, coated boards, and alternative inks. These materials can behave differently during handling. Small scuff marks may become visible on a carton’s dark logo or a glossy label.
An ASTM D5264 Sutherland Rub Tester provides a controlled way to evaluate that risk. ASTM International’s D5264 practice describes a standardized rub procedure for printed materials. It helps laboratories compare surface durability under defined pressure, stroke count, and contact conditions. The instrument is simple. The method is not always simple. Conditioning temperature, paper grain, ink curing, counterface cleanliness, and specimen alignment can influence results. ISO and ASTM testing guidance repeatedly emphasizes controlled conditioning and documented procedures for reliable comparisons. PMMI industry reports also highlight automation, traceability, and waste reduction as important packaging priorities. A repeatable rub test supports all three.
This guide explains how to prepare specimens, set the tester, select suitable rubbing materials, and record results in 2026. It also discusses common interpretation errors. A low rub score does not automatically prove a printing failure. It may indicate an unsuitable coating, insufficient drying, or an inconsistent test setup. That distinction matters. Good testing combines instrument discipline with professional judgment, current standard references, and clear evidence. Operators should verify the active ASTM edition, equipment calibration status, and customer requirements before testing. Careful notes still matter.
ASTM D5264 Sutherland Rub Tester: Purpose and Test Principles
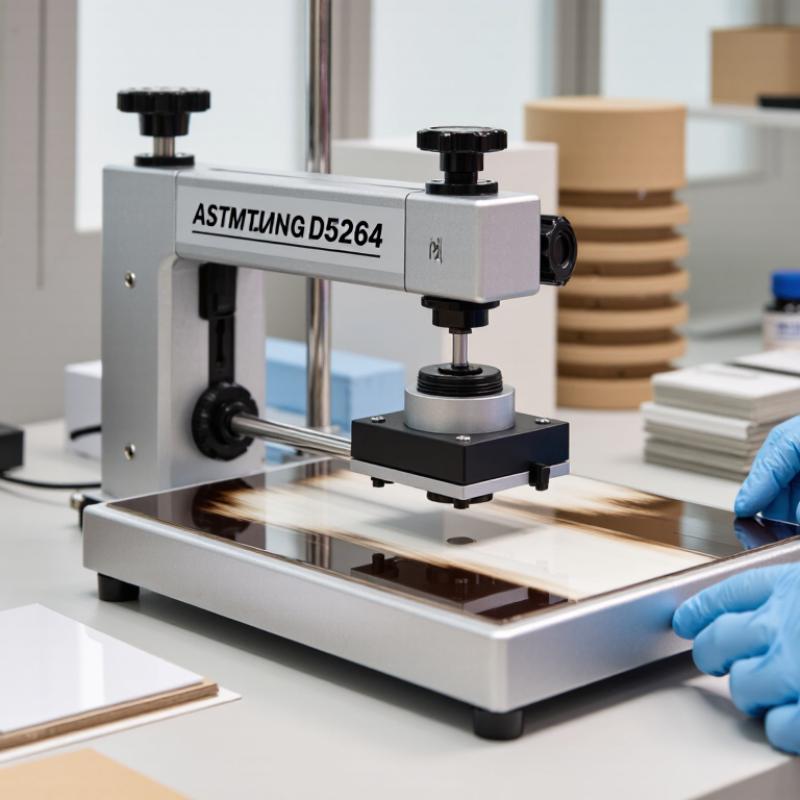
An ASTM D5264 Sutherland Rub Tester measures how well printed packaging resists scuffing, ink transfer, and surface wear. Its purpose is practical: reproduce rubbing during stacking, transport, and handling. ASTM D5264 uses a controlled sled, calibrated pressure, and repeated strokes across a printed specimen. Operators then compare ink loss, gloss change, or visible transfer against an approved reference.
The setup matters. Cut specimens from the same production area, condition them, and align the print direction consistently. A typical test uses selected rub counts, such as 50, 100, or 200 cycles, with the specified load and stroke rate. Keep the contact surface clean. One dirty sled can distort the result. That mistake is easy to miss.
Smithers’ 2024 packaging market analysis places global packaging demand above one trillion U.S. dollars, increasing the cost of small print defects at scale. The report also highlights sustainability pressures, which make surface durability more important when lightweight materials replace thicker structures. Record substrate, ink system, coating, humidity, load, and cycle count. ASTM D5264 improves repeatability, but it does not perfectly copy every warehouse journey. Results still need production trials and careful judgment.
How to Use an ASTM D5264 Sutherland Rub Tester in 2026?
ASTM D5264 evaluates the abrasion resistance of printed materials by rubbing a printed surface against a mating surface under controlled pressure and repeated strokes. The chart shows practical cycle checkpoints for organizing a rub-test sequence.
Use the same substrate, ink or coating, rub material, applied load, stroke speed, and conditioning environment throughout the comparison. ASTM D5264 does not define one universal cycle count for every product; the selected endpoint should be specified in the test plan or agreed between the parties. These checkpoints are programmed cycle levels, not measured performance results.
Set Test Parameters According to ASTM D5264
How to Use an ASTM D5264 Sutherland Rub Tester in 2026?
Set Test Parameters According to ASTM D5264
Begin by confirming the current ASTM D5264 edition and your laboratory procedure. The applicable edition controls the required load, stroke length, rubbing speed, and cycle count. Do not copy settings from an old worksheet without checking them. Small differences can change the reported result.
Condition the printed samples under the specified temperature and humidity before testing. Mark the print direction and inspect each surface for dust, wrinkles, or uneven coating. Secure the specimen flat on the tester bed. Select the prescribed felt or rubbing material, then install the correct weight carefully. Verify the stroke and speed with calibrated equipment. Record every setting before pressing start.
Use identical preparation for all samples. A clean reference sample helps separate ink failure from substrate damage. Stop the test at the required cycle intervals, such as those stated in the project specification. Examine scuffing under consistent lighting, and photograph meaningful changes. I have seen operators overlook light transfer because the sample looked acceptable from a distance. That judgment was too casual. Record observations, not assumptions.
Check the counter, timer, and weight position before each run. A loose clamp can create uneven pressure and misleading marks. If results vary widely, repeat the test after checking conditioning, alignment, and sample uniformity. ASTM language should guide the method, but trained technical judgment still matters. Never alter a parameter quietly to obtain a cleaner result. Document any deviation, even when it seems minor.
How to Use an ASTM D5264 Sutherland Rub Tester in 2026? - Set Test Parameters According to ASTM D5264
| Parameter | ASTM D5264-Aligned Requirement or Setting | Unit | Example Test Setting | Record or Control Point |
| Test method | Abrasion resistance of printed materials using a reciprocating rub tester | — | ASTM D5264 | Document the standard edition, laboratory procedure, and any customer-specific deviations. |
| Specimen type | Printed or coated material with a representative, fully cured surface | — | Printed paperboard | Use specimens from the same production lot and avoid wrinkles, creases, dust, or visible surface defects. |
| Specimen dimensions | Specimen must fit the tester securely and provide a flat rub path | mm | 50 × 150 | Confirm the holder and rubbing surface dimensions before cutting samples. |
| Conditioning | Condition test materials before evaluation when required by the laboratory procedure | °C / % RH | 23 ± 2 / 50 ± 5 | Record conditioning temperature, relative humidity, and duration; keep specimens flat. |
| Rubbing material | Use the specified standard rubbing medium or the medium defined by the product specification | — | Unprinted paper | Use a clean, unused rubbing piece for each test unless the procedure states otherwise. |
| Applied load | Select the load specified for the intended application and report it with the result | lb / N | 2 lb / 8.9 N | Verify the calibrated weight and confirm that it is centered on the rubbing head. |
| Rub stroke | Use the tester’s defined reciprocating stroke without changing the stroke length during a test series | mm | 100 | Check that the complete printed area remains within the active rub path. |
| Rub speed | Maintain the instrument’s validated reciprocating speed | cycles/min | 4 | A cycle is one complete forward-and-return movement; record the actual programmed speed. |
| Number of cycles | Choose the cycle count required for the comparison or product specification | cycles | 50 | Common checkpoints include 10, 20, 50, and 100 cycles; do not compare results from different counts. |
| Test direction | Keep the rub direction consistent with the printed grain, coating layout, or defined production orientation | — | Machine direction | Mark specimen orientation before testing and use the same orientation for all replicates. |
| Replicates | Test multiple specimens to assess variation within the material lot | specimens | 5 | Report individual observations and the average only when the laboratory procedure permits averaging. |
| Visual evaluation | Inspect for ink transfer, scuffing, loss of gloss, image damage, and coating removal | rating | No visible breakthrough | Use a defined rating scale or pass/fail limit; evaluate under consistent lighting and viewing conditions. |
| Example observation after 50 cycles | Illustrative test record for a printed paperboard specimen | — | Light scuffing | Record as an observation only; acceptance depends on the applicable product requirement. |
| Result report | Report all conditions necessary to reproduce the test | — | Complete | Include specimen identification, load, rubbing medium, stroke, speed, cycles, conditioning, observations, and deviations. |
Note: ASTM D5264 test settings should be applied together with the current standard, the validated laboratory procedure, and the product specification. Load, cycle count, rubbing medium, and acceptance criteria must be kept consistent when comparing results.
Perform the Sutherland Rub Test Step by Step
An ASTM D5264 Sutherland rub test measures how well printed surfaces resist dry rubbing. Begin by conditioning the printed specimens and receptor material in a controlled laboratory environment. Record temperature and humidity. Small changes can affect results. Cut clean samples without fingerprints, wrinkles, or loose edges. Mark the print direction and test area.
Inspect the rub tester before use. Confirm the stroke length, rubbing speed, counter, and selected load. Check that the rubbing head moves smoothly. Mount the specimen securely, with the printed side facing the receptor material. Use the load and stroke count required by your approved test method. Do not guess these settings. Place the receptor material evenly beneath the head, then start the machine and observe unusual movement.
After testing, remove the receptor carefully. Compare transferred ink, scuffing, gloss change, and coating damage under consistent lighting. Photograph both surfaces and record the test settings, specimen identity, and visible rating. My early mistake was judging transfer beside a bright window. The glare hid light scuffing. A neutral background works better. Visual ratings still involve judgment, so two trained technicians should review borderline results. Repeat testing when the specimen contains heavy texture, uneven coverage, or an obvious mounting error. Small details matter.
Evaluate Results and Document Test Conditions
Using an ASTM D5264 Sutherland Rub Tester in 2026 requires more than counting rub cycles. The test evaluates print or coating resistance under controlled rubbing conditions. Record the specimen, substrate, ink system, load, stroke length, cycle count, temperature, and relative humidity. Note the conditioning time, too. A missed conditioning step can quietly distort the result.
The 2024 Smithers report, The Future of Global Packaging to 2028, projects the global packaging market will exceed 1.2 trillion dollars by 2028. More packaging means more printed surfaces moving through filling, transport, and retail handling. Consistent documentation therefore matters.
Capture before-and-after images under identical lighting. Record gloss loss, ink transfer, scuffing, exposed substrate, and any color change. Use a defined rating scale, not casual words such as “looks fine.”
Small details matter.
Compare replicate specimens, then report the mean and variation. A single strong result can hide unstable production. ASTM D5264 does not create a universal pass-or-fail limit; the buyer, converter, or internal specification must define acceptance criteria. The 2024 Packaging Machinery Manufacturers Institute outlook also identifies automation and quality monitoring as continuing priorities, making traceable test records increasingly valuable. My own review would include one uncomfortable question: was the instrument verified before testing? If the answer is uncertain, the result deserves a qualification, not false confidence. Keep deviations visible, including damaged samples, uneven pressure, incorrect conditioning, or operator changes. Each record should allow another technician to repeat the test without guessing.